How to Install LED Strip Lights?
Installing LED strip lights looks simple. Peel, stick, and switch them on? Not quite. A reliable result starts with careful measuring, a clean mounting surface, and a quick test before the adhesive touches the wall. Small details matter. A crooked first section can remain visible along a shelf or ceiling edge.
Strip Light installation specialist Jordan Lee offers a practical reminder: “Test the strip before you commit it to the surface.” This guide follows that advice, covering how to plan the route, check the power supply, prepare the surface, and attach the lights without stretching or sharply bending them. It also explains where connectors may help and why the manufacturer’s instructions should guide each step. Specifications vary. Check them.
Expect a little adjustment. Even a measured run can meet an awkward corner, and adhesive may not grip dusty paint as expected. That is worth pausing over, not hiding. We’ll look at common mistakes, simple troubleshooting, and ways to keep the finished line neat and evenly lit. The aim is practical: install with care, inspect the result, and make changes before the strip is firmly in place. One more test. Then switch it on.
Plan the LED Strip Layout and Choose a Suitable Power Supply
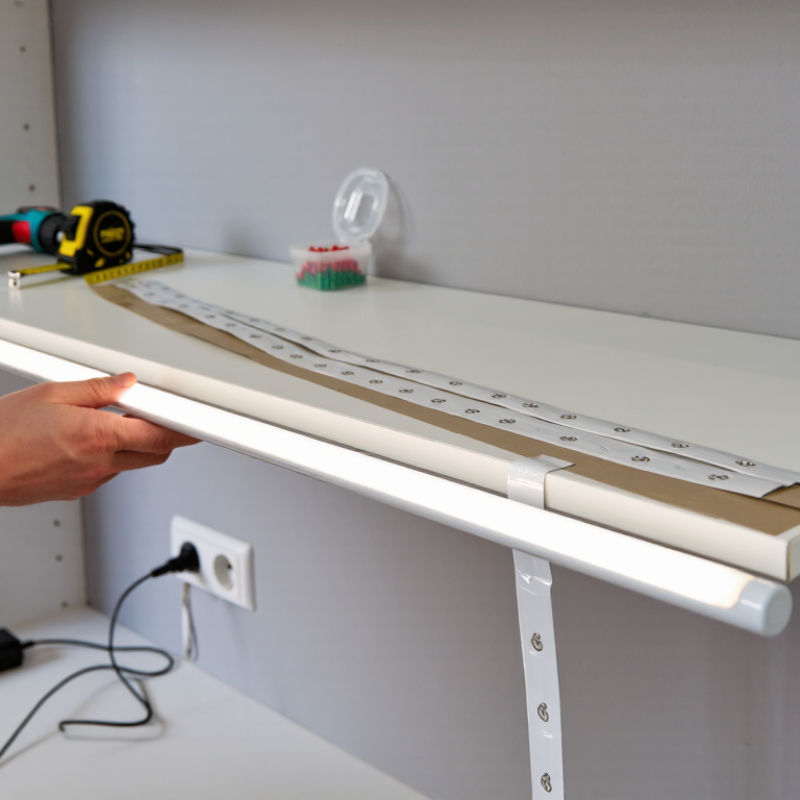
Plan the LED strip route before peeling off the adhesive backing. Measure each straight section, then note corners, gaps, and nearby power outlets. A quick sketch can prevent awkward joins later. Check the strip’s marked cut points; cutting between them may damage a section. Clean and dry the mounting surface, since dust and grease can weaken adhesion. Leave room to reach connectors and the power supply. A layout that looks neat on paper may need adjustment around cabinets or door frames.
Choose a power supply that matches the strip’s voltage exactly. To estimate the required wattage, multiply the strip’s watts per meter by the total length. For example, a 5-meter strip rated at 10 watts per meter needs 50 watts; allowing about 20 percent extra capacity gives a useful margin. Check the strip’s recommended maximum run length, too. Long runs can appear dimmer near the far end, so a suitable feed arrangement may be needed. Keep the supply ventilated and accessible, not trapped behind insulation. I once underestimated outlet access in a layout sketch; it is an easy detail to miss.
Tips: Test the full strip before installation. Confirm the connectors fit, and keep the power disconnected while cutting or wiring. If the instructions are unclear, pause and ask a qualified electrician.
Gather the Tools and Materials Needed for Installation
Before installing LED strip lights, gather the full kit: the strip, a compatible power supply, and any controller or connectors it requires. Check the voltage and connector type on the packaging; parts that look similar may not work together. Keep the instructions nearby. They can clarify where the strip may be cut and how much power the setup needs.
Measure the route with a tape measure, then mark key points lightly with a pencil. A second measurement is worth the pause. You will also need clean, dry cloths, scissors or a cutter for marked cut points, and mounting clips if the adhesive backing may not hold. A small level helps keep runs straight, especially under cabinets. Keep it simple. Before handling connections, unplug the power supply. If you use rubbing alcohol to clean a surface, check that it will not damage the finish and let it dry fully. A stable step stool may help with high areas; avoid stretching or balancing on furniture. Small details matter. I once thought extra connectors were unnecessary, but having one spare can prevent a stalled installation. Still, buy only parts confirmed compatible with your strip.
Prepare the Surface and Measure the Strip
Before peeling the backing, inspect the mounting surface in daylight. Dust, cooking residue, and textured paint can weaken adhesive contact. Wipe the route with a surface-safe cleaner, then let it dry completely. Dry means dry. Check painted walls for loose or uncured paint, and test a small area if the finish is delicate. Adhesive performance varies with temperature and surface material, so follow the strip’s installation instructions rather than forcing it onto a rough or damp wall.
Measure the full path with a flexible tape, including corners and the distance to the power connection. Add a small allowance for routing, but do not stretch the strip to make it fit. Mark cut points only where the strip indicates; cutting elsewhere can damage its electrical path. The U.S. Department of Energy’s 2019 Energy Savings Forecast of Solid-State Lighting projects annual savings of 569 terawatt-hours by 2035 compared with a scenario without LED adoption. That projection concerns lighting broadly, not an individual strip, but it shows why reliable installation matters. I still recheck corners; they are easy to misjudge. A pencil line helps.
Attach the LED Strip and Connect the Power Supply
Before peeling the adhesive backing, lay the LED strip along the planned route and check its length. Clean the surface with a lint-free cloth, then let it dry completely. Dust or moisture can weaken the bond. Test the strip briefly before mounting it, with the power supply disconnected while you position it. This small check can save a lot of rework. I have found that rushing the corners is an easy mistake; sharp bends may damage the light or cause uneven illumination. Use a gentle curve, or cut only at marked cut points when the strip needs shortening.
Press the strip down a little at a time, applying light, even pressure rather than stretching it. Keep the connector area accessible. Match the strip’s voltage and polarity to the power supply, and confirm that the supply can handle the strip’s total load. Never force mismatched connectors. Check the connection guide if the markings are unclear. Once everything is secure, connect the power supply and switch it on to inspect the full run for dark sections or flickering. If a section fails, disconnect power before checking the connector or alignment. It is tempting to press harder and hope; that does not always fix a poor connection.
How to Install LED Strip Lights: Attach the Strip and Connect the Power Supply
Example power-supply output for a 4.8 W/m LED strip, calculated with 20% headroom. Clean and dry the surface before attaching the strip, then connect it to a compatible supply with the correct voltage and polarity. Check your strip’s actual power rating before installation.
Calculation: strip length × 4.8 W/m × 1.2. The values shown are calculated examples, not measurements of a specific product.
Test the Lights and Check the Connections
Once the strip is positioned, test it before securing the full length. Connect it to a power supply that matches the strip’s voltage and rating, then switch it on. The LEDs should glow evenly, without flickering or dark sections. Check the first few feet and the far end; a dim end can signal a loose connection or an overloaded supply. Keep the strip on a dry, clear surface during the test.
Tips: Turn off and unplug the supply before adjusting any connector. Check that the positive and negative markings align, and make sure copper contacts sit fully inside the connector. Small details matter.
If a section stays dark, inspect the connection points with the power off. Look for shifted contacts, a pinched strip, or a sharp bend near a cut mark. Restore power only after everything is seated correctly. Don’t force a connector that feels tight; it may be misaligned. A quick test can catch problems, though it does not guarantee every connection will stay reliable after mounting. Check the lights again once the strip is secured, especially around corners. Sometimes the fault is less obvious than expected.

