7 Tips for Choosing the Best LED Light Kit
Choosing a LED light kit is not just a matter of picking the brightest box on the shelf. The U.S. Department of Energy reports that LEDs use at least 75% less energy and can last up to 25 times longer than incandescent lighting. That efficiency is useful, but it does not guarantee flattering color, comfortable brightness, or compatibility with your camera and workspace. Small details matter. A face under a desk lamp, for example, can look washed out when the light’s color rendering is poor.
The market is expanding, too. MarketsandMarkets estimated the global LED lighting market at $75.3 billion in 2023 and forecast $111 billion by 2028. Growth brings more options, not always clearer choices. Lighting researcher Dr. Mariana Figueiro has described light as “the most powerful synchronizer of the circadian system.” Her work is a reminder that color temperature and exposure deserve attention, though a single kit cannot solve every lighting need.
This guide outlines seven practical checks: brightness, color accuracy, color temperature, dimming, heat management, mounting, and power options. Look beyond headline wattage. Check lumens, CRI, and whether the kit’s controls suit your setup. A low-cost kit may work well for occasional use, but its specifications can leave questions unanswered. That is easy to overlook. The best choice depends on what you film, photograph, or illuminate—and even careful comparisons cannot make every product fit every room.
What an LED Light Kit Includes and How It Works
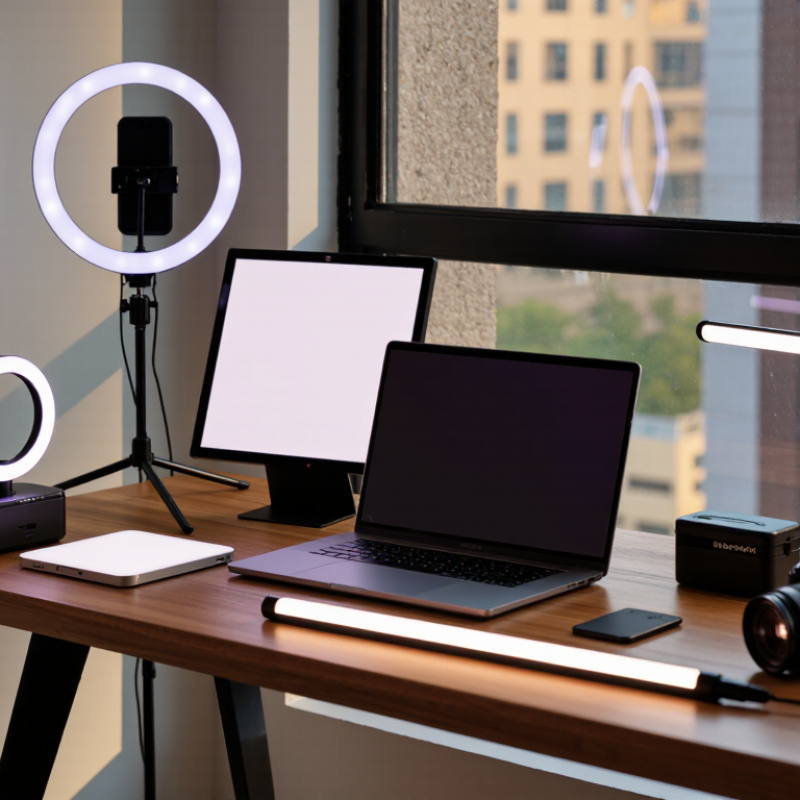
An LED light kit is a coordinated set of parts that produces and controls light. Depending on its purpose, it may include LED boards or bulbs, a driver, wiring, connectors, mounting clips, and a diffuser. Some kits also provide a dimmer or remote control. Check the package list: “kit” does not always mean every installation accessory is included.
The driver converts household AC power into the lower-voltage current LEDs need. LED chips create light, while a heat sink carries warmth away from them. That small detail matters. Excess heat can shorten component life, so a compact kit needs enough room for airflow. A diffuser softens bright points; without one, bare LEDs can feel harsh.
Before choosing a kit, compare its lumen output, color temperature, color-rendering index, dimmer compatibility, and stated indoor or damp-location rating. A box can look complete, yet omit a compatible dimmer; check before buying. The U.S. Department of Energy’s 2019 Energy Savings Forecast of Solid-State Lighting in General Illumination Applications estimated that LED lighting could save 569 terawatt-hours of electricity annually by 2035. That national projection is not a promise about one kit. For a specific setup, confirm the driver’s rating and the fixture’s fit.
How to Match a Kit to Your Vehicle and Lighting Needs
Choosing an LED kit starts with the vehicle, not the brightest number on the box. Check the year, trim, bulb socket, and housing depth in your owner’s manual. A bulb may fit the socket but still hit the dust cap or cooling fan. Measure the space behind the headlamp. Check connector type and electrical requirements, too; some vehicles may show warnings after a lighting change.
Then match the beam to where you drive. A tight, controlled pattern matters more than a harsh white appearance, especially on wet roads or in traffic. Look for clear photometric test information, not only lumen claims. The Insurance Institute for Highway Safety reported in a 2017 analysis that vehicles with good-rated headlights had 19 percent fewer nighttime single-vehicle crashes than those with poor-rated headlights. That finding concerns complete headlight systems, not a guarantee that any retrofit kit will improve safety. Fit matters.
Heat and upkeep are easy to overlook. Confirm the kit’s cooling parts have room to work, and avoid forcing wires against sharp metal or hot surfaces. If you often drive rural roads, prioritize useful distance and a clean cutoff; in town, glare control deserves equal attention. One easy mistake is chasing color temperature as if bluer light always means better visibility. It doesn’t. Check installation guidance and applicable vehicle requirements before buying, and reassess the beam after fitting.
7 Tips for Choosing the Best LED Light Kit - How to Match a Kit to Your Vehicle and Lighting Needs
| Tip | What to Check | How to Match It to Your Vehicle | Why It Matters |
|---|---|---|---|
| 1. Confirm bulb fitment | Check the owner’s manual or a reliable vehicle fitment guide for the bulb type used in each location. | Match the exact socket and application, such as low beam, high beam, fog light, or interior light. A bulb that fits one position may not fit another. | Different sockets and headlamp designs require different bulb shapes and mounting arrangements. |
| 2. Check vehicle voltage | Verify the vehicle’s electrical system voltage and the kit’s stated operating-voltage range. | Many passenger vehicles use 12-volt systems, while some commercial vehicles use 24-volt systems. Confirm compatibility rather than assuming. | A kit must be designed for the vehicle’s electrical system to operate as intended. |
| 3. Match the beam pattern | Look for a light source designed to work with the vehicle’s reflector or projector housing, and check that it produces a clear cutoff where required. | After installation, aim the headlamps according to the vehicle manual and check the beam pattern on a level surface. | A poor beam pattern can create glare for other road users while reducing useful illumination for the driver. |
| 4. Choose a practical color temperature | Compare the kit’s stated color temperature, usually given in kelvin (K), and consider visibility in the conditions where you drive. | Choose a color that is comfortable for regular driving and suitable for the vehicle’s intended use; do not select by appearance alone. | Color temperature describes the light’s appearance, not its brightness or overall lighting performance. |
| 5. Allow for installation space | Check the bulb, heat sink, cooling fan, driver, and connector dimensions, as well as the clearance behind the housing. | Compare measurements with the available space and confirm that dust caps and covers can be refitted without pressure on wiring. | Some LED assemblies are larger than the original bulb and may not fit behind every headlamp housing. |
| 6. Review electrical compatibility | Check whether the kit requires an adapter, decoder, or other component, and follow the vehicle and kit installation instructions. | If the vehicle displays a bulb warning, flickers, or has an unusual lighting circuit, confirm compatibility before purchase or installation. | Vehicle monitoring systems and wiring configurations vary, so an LED replacement may not behave identically to an original bulb. |
| 7. Check legal and weather requirements | Review local lighting regulations and the kit’s stated ratings for the intended location, including any ingress-protection rating. | Confirm that the light is permitted for road use in your jurisdiction and suitable for the vehicle’s exposure to water, dust, and vibration. | Approval requirements differ by location and application; a weather-resistance rating alone does not establish road legality. |
How to Compare Brightness, Color, and Beam Pattern
When comparing LED light kits, treat brightness claims as a starting point, not a verdict. Lumens describe total light output, but they do not show where that light lands. Check beam distance and usable spread, then compare kits at the same distance and on the same surface. A bright hotspot may look impressive on a wall yet leave the roadside edges dim. That matters.
Color temperature affects comfort and visibility. A cooler white can make signs and details appear crisp, while a warmer tone may feel easier on the eyes in rain, dust, or fog. Numbers alone cannot settle it; compare the light outdoors if possible. Look for a balanced beam, without sharp dark gaps or excessive glare. For driving lights, review how the beam is shaped and aimed, and follow the vehicle and kit instructions. For work areas, broad, even coverage may be more useful than a narrow, long-reaching beam. Small differences matter.
I would not choose by the highest lumen figure alone. Spec sheets can omit how brightness changes with heat, and that is an easy detail to miss. Check whether output is measured per lamp or for the full kit, and seek clear test conditions. A simple comparison on a dark wall can reveal color and beam flaws, though it cannot replace safe, real-world use.
How to Check Compatibility, Durability, and Installation
Before buying an LED light kit, check the vehicle’s year, model, and trim against the kit’s fitment details. Similar-looking headlights can use different connectors or mounting tabs. Compare the plug shape and pin count with your existing unit, and confirm whether adapters are included. A quick photo of the original connector can help. So can the owner’s manual. If the listing leaves compatibility unclear, ask the seller before ordering rather than forcing a connection later.
Durability depends on more than a heavy-looking housing. Look for sealed joints, sturdy brackets, and clear information about water and dust resistance. Inspect the kit’s wiring for secure insulation, especially where it bends near the engine bay. Heat matters, too; give cooling fans or heat sinks enough room to work. Installation instructions should show connector orientation and mounting points, not just a finished product. Set aside basic tools and test the lights before replacing covers or trim. Keep the original parts nearby. Small clips can be stubborn.
A driveway check is useful, but it cannot reveal every long-term weakness. I once assumed a snug fit meant a secure mount; a loose bracket showed otherwise after a rough road. Recheck fasteners after installation, and stop if wires pinch or the housing will not sit flush. Better to pause. A little doubt can prevent a damaged connector.
How to Assess Safety, Warranty, and Overall Value
A low price can look appealing, but safety deserves a closer check. Read the kit’s label and manual for its voltage, power draw, and installation limits. Then compare those details with your vehicle or workspace. A plug that fits is not proof of compatibility. Look for testing or safety marks recognized in your region, and verify them in the product documentation. If the wiring diagram is vague, pause.
Inspect the practical details, too. Are connectors insulated? Do cables feel sturdy, and can they be routed away from sharp edges or hot surfaces? After installation, check for loose fittings and unusual heat during normal use. Small details matter. I once focused too much on brightness and not enough on cable length; rerouting took longer than expected. That was my mistake, and it is worth considering before buying.
Warranty terms help reveal the kit’s real value. Check how long coverage lasts, which parts are included, and whether labor or shipping is excluded. Keep the receipt and installation instructions. A longer warranty is not automatically better if claims are difficult to make. Compare the total cost with expected lifespan, replaceable components, and support access. The cheapest option may cost more if one failed connector means replacing the whole kit.
7 Tips for Choosing the Best LED Light Kit
Suggested decision weights for comparing safety, warranty, and overall value. These are practical guideline weights, not measured market data.
How to use this: Give each kit a score for every criterion, then apply the suggested weights. Check for applicable safety certification, compare warranty terms, and review CRI, color temperature, light output, dimming compatibility, heat management, and total cost before buying.

